Patience, Grasshopper.
Since the flying is the most important part of this article, we will get to it right away after a brief introduction. Sections on the build, set up and equipment will follow.

The release of the much improved 3DHS Extra SHP V3 affords me the opportunity to dust off a very well received concept and present it to you once again with improved content and format. The most fun and popular project we have done yet was setting up a 3DHS Extra SHP for sport, and then letting sport pilots fly it.
Unfortunately I neglected to chronicle that part and the article concentrated on the plane's flying characteristics and set up. We will do that this time too, but you'll also hear from some of the sport pilots who tried this plane for the first time.
Speaking of which, this report will be geared for the new guys, though skilled sport pilots will love this plane too. I see it all the time that newer pilots are afraid of these types of planes because they think it is too hot, or too difficult for them. It's not. There are just a lot of old wives's tales out there.
Relax. You can do it with this plane.

This is not a difficult airplane for the new guys to be afraid of. Yeah, I know it's an awesome looking scale aerobatic plane, but it is also engineered to be very easy to fly, even for newer pilots. A lot of these newer pilots will also be learning aerobatics on this plane, so the last thing you want to do is put them into something scary. You want to put them into something that will teach them, and build their confidence. No plane is better for than than the SHP.
For those of you who are flying something like a Mini Ultra Stick, or Mini Pulse, remember that is where I came from to fly my first SHP. For me, the SHP flys so much better, so much more solidly and precisely that it was a seamless transition. At first, like a lot of you, I was afraid of it because it is such a cool plane that it couldn't possibly be easy. Of course, that disappeared as soon as she broke ground.
While the SHP is very easy going and gentle to fly, if you dig your spurs into her, she will take off like Secretariat. But, that's not what we are doing here. We're going to give you a plane that will be smooth, solid, and easy to fly, but will still do all the conventional aerobatics.

When I was asking people to fly my SHP Sport, some refused saying "Oh, I can't handle a hot scale plane," or "that plane is too much for me." Being the unrelenting type, I would insist until they would fly it, and that would always convince them and surprise them.
And delight them.

So, as always, truth is flying, and flying is truth. If it flies right, it is right, and the SHP does and is both, especially as a sport plane.
Worth noting from a personal standpoint, this sport set up was developed on my original Extra SHP, which began it's life as a humble, but terrific, sport plane. While the SHP has taught me so much and opened so many doors for me, all I wanted from her in the beginning was to be fun and easy to fly... and she has far exceeded any expectation I ever had.
FLYING
First, for those of you who are really new, it's always a good idea to have your instructor (or anyone else you trust) to trim the plane out for you, and stay with you for a few flights until you are comfortable and confident. Mostly this is because, especially when we are new, the idea of bashing a brand new plane freaks us out. You don't need that pressure, so get some good help if you can.
The key to the SHP's (and her many pilot's) success is her sublime stability. She will resolutely refuse to do anything that you don't tell her to do. At first, it will take a little adjusting for the pilot not to rely on the plane to correct his every mistake, but in a flight or two you will find this to be much easier than the plane fighting you every step of the way and doing what it wants to do instead. The SHP goes, and stays, where you tell it to. You are in control here.

Sport pilots, especially new ones, want a plane that is easy and lands slowly. For many of us, it was landing the plane that gave us the most trouble while learning to fly. I'm sure some of you are worried that a plane like this will be difficult to land, but that isn't the case at all. You will see in the videos that you can slow her down to a walking speed, pull the nose up and mush her in nice and gentle. Compared to the other planes I fly, the SHP V3 in sport trim lands much better and much easier. The SHP is so easy to fly that I would say she is better in this regard than most trainers. She does beautiful landings. I love to shoot touch and goes with this plane simply because it is so easy and looks so nice.
The SHP has always been an extremely predictable airplane. She will never do anything that takes you by surprise. She won't snap, spin or freak out when you stall her like some scale aerobatic planes will. The worst an SHP will do in a stall is drop her nose and start flying again, just like your trainer did. Add some power and fly her out.
Video #1 features my friend Warren, who has been flying about a year and considers himself a sport flyer. He's pretty decent, but still appreciated how easy the SHP Sport was to fly, and how nimble it is. You may want to crank up the sound a bit (once you get past the Thunder Power thunder clap) so you can hear his commentary.
The SHP V3 has kept her smooth, gentle, floaty flying nature, but it's just better. With the lighter wing loading, the SHP V3 is even more floaty than before, so you can fly it slower and with more control. You simply have a little more time to make things happen, or recover from things you didn't mean to happen. You never feel rushed when you are doing a maneuver with the SHP.

The other end of the spectrum is the SHP's agility. I think it is safe to say there are very, very few sport planes that can touch the SHP for it's ability to roll, spin. knife edge (KE) and turn hard, all while remaining completely composed and under control. You can fly it extremely hard, or you can putter lazily around with her too.... all with complete confidence.
While the side force generators (SFG) improve performance in Knife Edge (KE) flight, I also think they add some stability here too. I have more confidence in KE with the V3 than my earlier SHPs, so I think the new SFGs are probably an improvement over the Extra SR SFGs that I've been using on my older SHPs. Either way, totally rock solid KE performance from this plane. This might be my new KE practise plane.
Video #2 is my friend Steve, who has been flying about six months. He has been sport flying a 3DHS Vyper and is working on his flight skills, so I thought he would be the ideal candidare to try out the SHP Sport, from a beginning sport pilot's perspective.
You have to work a little harder with the SHP to make it do something violent, but that is something experienced pilots adapt to pretty quickly. This also keeps the new pilot from getting into something he didn't bargain for. Newbie or experienced, the SHP has a place with these pilots and everyone in between.
The SHP does it all. Rolls, loops, spins, KE spins, tumbles, and even some stuff you don't want to try just yet. It does all the conventional maneuvers gracefully and smoothly.
The trade off with a plane as stable as this is the you will usually give up a little agility. It is surprising, however, that a plane as sublimely stable as the SHP gives up as little agility as it does. The SHP Sport will still loop roll, knife edge, and spin as well, and better, than most, if not all other sport planes. It will even flat spin if you know how to do it.

Why The SHP Makes Such An awesome Sport Plane
An airplane doesn't have to look good to fly good, but it's more enjoyable to fly something that's attractive. The SHP has always been an awesome looking plane with smooth, graceful lines, and the new V3 color scheme really sets those lines off. The Extra SHP is also a real full sized airplane, so that will satisfy those who insist on flying something that looks scale. Bottom line is the SHP is as good looking as anything at the field, and much more attractive than most.

All good airplanes share a lot of the same characteristics. Stability is crucial in sport, pattern, racing, and even scale planes. The SHP gives up nothing in stability, and yet remains a very agile plane capable of doing all of the conventional aerobatics. Much of this is due to the solid engineering Scott Stoop's put into this (and every) design, and much is because attributes like light weight and robust construction are invaluable for sport flying. What you end up with is a solid, stable and predictable airframe that won't surprise you, and if you do make a minor mistake she will take the abuse.
Sport planes also get knocked around a lot, especially in the hands of newer pilots. The SHP has always been one of the most robust airplanes on the market, but the V3 has an upgraded landing gear system that is about as bomb proof as you can get for something that isn't made out of steel and concrete.
Strong, stable, agile. These are crucial attributes for a good sport plane, and I can't think of another sport plane that does these things as well as the SHP.
Righteous Upgrades For The Extra SHP V3
Lighter Weight
For the V3, Scott Stoops managed to shave off a little weight by eliminating the unnecessary rudder servo tray inside the fuselage that is used with a pull-pull cable system. The cable option used to be there for use with lighter motors to help get the weight out of the tail, but It has been well established that the SHP flies best with a 103 gram motor. It's the right weight and the perfect amount of power. The pull-pull rudder tray was simply dead weight, so it had to go.
I've looked through the whole plane pretty carefully, and I can't see any other weight saving measures, but they must be there. I haven't weighed the new SHP, but it does fly much lighter and behaves much more floaty than the previous generation.
This floatyness is also helped by the addition of another inch of wingspan. It might not seem like much, but a little more wing and a little less weight yields a big performance increase. I have many, many flights on all sorts of SHPs, and this gain showed up immediately the very first time I flew the plane.
Trick SFGs
Another nice little feature that is new for the SHP is side force generators. First, I just like the way they look, but they are also very useful. They add lift and stability in knife edge flight, as well as keep the lift from spilling off the wingtips in high angles of attack, such as in a stall. The SHP has never had a problem in this area anyway, but this makes it even more stable and predictable. Personally I think the SFGs improve performance all the way around. The plane just feels better no matter what you're doing, which is why I have used them on my SHPs almost from the beginning.

And, if you don't like them, you don't have to use them. They attach with self tapping screws, so just leave them in the bag. The SHP is fine without them.
But, don't be afraid of the SFGs simply because they are high performance pieces. The real performance comes from them helping to make the plane smoother, more precise, and easier to fly.
Bomb Proof Landing Gear System
Most lightweight planes suffer the same Achilles' heel, and that's the landing gear. Lots of planes are unacceptably, if not criminally under built in this area, primarily to save weight, but this is very short sighted. This is the area that takes the most continued abuse, and even the brunt of most impacts. It's got to be strong here because it's no good if a minor mistake turns the airplane into a bag of splintered hooey.
Until now, no one had come up with a landing gear and attachment that is as tough as the rest of the plane, so plenty of guys have pulled the bottom out of planes. The SHP has always had a really good landing gear system, but it wasn't perfect.
That is ..... until now.
Composite Landing Gear Block
Maybe the most helpful improvement for newer pilots, is 3DHS' new bomb proof landing gear block assembly. A carbon fiber plate is bonded to a laminated composite landing gear block, which is then supported by carbon rods running through the assembly and also through plywood formers. It's difficult to get a good picture of it, and you'll have to look under the battery tray to see it, but this new assembly is a very righteous upgrade.

Absolutely bomb proof.
Stiffer Carbon Gear Legs
The original SHPs twin gear legs were made a little springy to absord some of the abuse a sport plane will inevitably take, but with the bomb proof landing gear assembly, this was no longer necessary. For the new SHP, an upgraded, thicker (roughly double the thickness), single piece carbon leg is pressed into service. Not only is this gear much more durable, but without the springiness it's a lot easier to slick in a nice landing with no bounce.
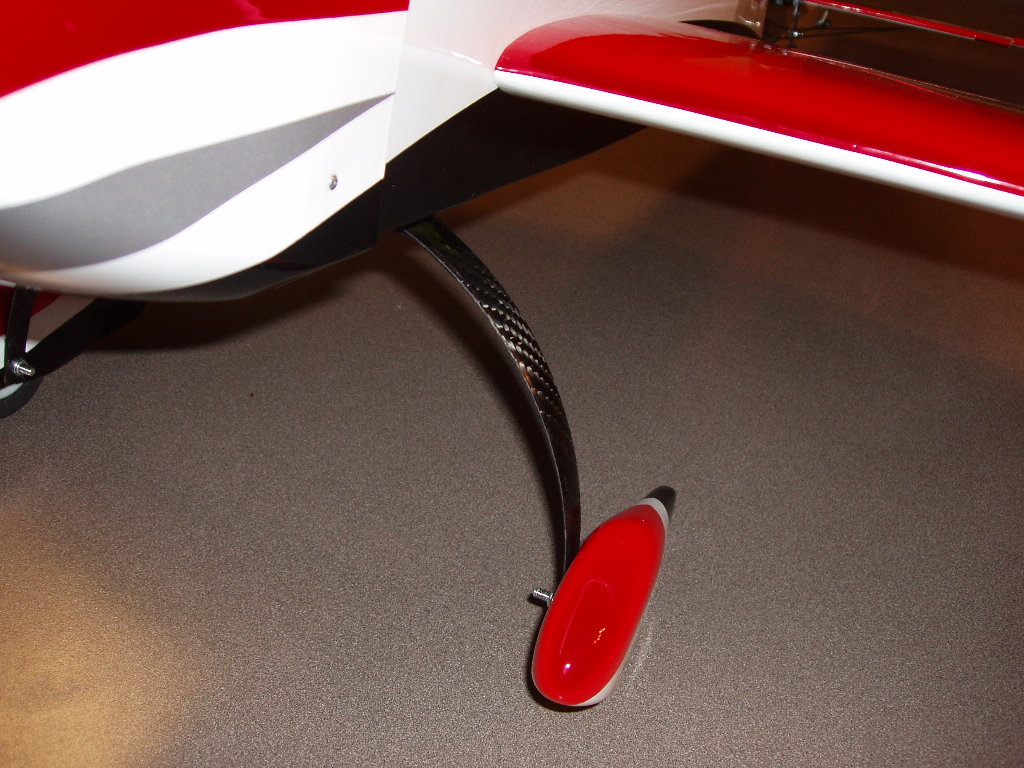
The carbon work is beautifully done, art almost, and it is a very high quality piece. So, what used to be the weakest link of every lightweight electric airplane on the market is now a thing of the past. I think it's safe to say this will be the standard gear leg for the 47" line up.
Integrated System
The LG block and assembly is so much tougher that you can get away with a stronger landing gear leg set. The LG block assembly and stronger gear legs are designed to work as a system, and spread any shock load over a larger, stronger area instead of having a weaker piece fail.
Of course, you can break the gear if you pound it hard enough, but that is still better than tearing the bottom of the plane out. Landing gear are replaceable and relatively cheap compared to having to repair the fuselage. I'm willing to bet that anyone who can break the landing gear block is going to destroy the plane and whatever it hits.
Hardware
Since 3D hobby Shop's hardware packages are already the industry standard, there was no need to improve on any of that. If you have built a 3DHS plane, you know exactly what I mean, and it is always nice to work with hardware that you are familiar with, not to mention have spares of. You never have to second guess any of this stuff. Just put it on the way the instructions call for and it works every time.

This hardware pack is so complete that there is nothing else to buy except glue, and maybe a wire tie or two if you want to tidy up your servo wires. Not seen in the picture is the strip of Velcro that comes with the pack. It appears to be the Velcro brand type of Velcro, which is what I prefer. Just another example of the no compromises quality in all 3DHS planes.
Build
This part of the report is easy because there are so many good resources that anything I can write has already been done. All you have to do is follow the manual exactly to the letter. Also extremely helpful are IPSmotor's outstanding build videos. I watch those before I build anything, including this airplane.
Also, there is a great community of SHP pilots at RC Groups that are very helpful if you need some guidance, and there is a ton of good information on the SHP thread. And, the SHP is also covered extensively on my blog.
On top of that, 3DHS' customer support is absolutely unparalleled in the industry. The answer to any problem you have is only a phone call, email or RC Groups PM away. Of course, if you follow the manual and watch the build videos, it is very unlikely you'll have a problem of any kind.
One thing modeling has taught me is patience. It takes less time to do it right the first time than to have to go back and fix it if you get it wrong. Work slowly and carefully, and forget those two hour build times you hear about. It's better to take your time and get it right. I work agonizingly slowly, but my SHP only took 5.5 hours to build. In fact, don't even use that as a benchmark. It takes whatever time it takes. You're going to have this plane a long time, so now is the time to make sure everything is done right.
You can build an SHP so quickly because you never have to fix anything that doesn't fit. 3DHS quality is legendary. The SHP is designed to be an entry level aerobatic plane, so it has to be easy for the inexperienced to put together. Everything is simplified and the hard parts are already taken care of. I mean, if I can build one, so can the Geico caveman.
The SHP will just about snap together, but again, take your time.
Worth noting is this is my third consecutive SHP that took absolutely no trim at all until I made it nose heavy for this project. Then it took a little up trim. In the old days, you would be a really awesome builder if you could get maybe two or three like this in a lifetime, but now days 3DHS planes almost come out of the box this way.
Set Up
OK, this is where we have to get deadly serious because set up is everything. This is the only place where you will deviate from the manual. The set up in the manual is for extremely aggressive flying, and you new guys have a ways to go before you will want to try that. Again, this set up will give you a very easy to fly plane.
You can take the best flying plane on the planet and turn it into a pig, simply by screwing up the set up. Set up work isn't that hard, but for some reason we all tend to get lazy here and fly around any short comings. Of course, that's most often we we get a pig. I've learned to resist the temptation to fly a new plane hard, and instead, spend the first day getting all my trims, mixes and CG dialed in. You're a lot less likely to wreck a brand new plane if it's set up right.
As stated before, this article is aimed at the new guy, and so is this set up. On high rates she is going to be very, very gentle. I think most new guys will have no problems at all, and will revel in the SHP so much like this that they will improve their game almost right away ... just as soon as they are over the new plane jitters. For guys who are just coming off their trainers, low rate is a good place to start. On low rates, I truely believe a good instructor on a buddy cord could teach a sharp young guy how to fly with this plane.
When you order your SHP, it's an excellent idea to also order the AJ control throw gauge. I think this is more accurate and certainly easier than measuring it. I'm going to give you the set up in degrees, so you need this piece. It's only like $5, and it's a great tool, so save on the shipping costs now and have Ben or Tyler throw one in the box for you.

And, while we are saving on shipping costs, the most valuable flying tool a new guy or even experienced pilot can have is Scott Stoop's book, Mastering Radio Controlled Flight. I have learned so much from this book and have really grown as a pilot because of it. I still flip through it every day. Always looking to improve my game, when I want to work on a particular maneuver, I always consult the book so I know everything I need to know about how to get it right.
Clear Programming
First, start with a clean program on your transmitter. Don't copy an old one. Format or clear a program so you start from scratch. We don't want to have to deal with any left over mixes or chase any other digital ghosts from the last plane.
Set all of your high rates at 100%, and the same with your end point controls. It is crucial you do this now so we get the right amount of throw and maximum mechanical advantage from the servos. I like to use the end point controls for fine tuning and make the major set up adjustments mechanically.
Mechanical Set Up
For sport, on ailerons and elevator we use the largest double arm arm that comes with the Hi Tech HS65 servo. If you put it on the servo and it doesn't center just right, turn it 180 degrees and it probably will. If it doesn't you will be close enough to take care of it with the sub trims. You can snip off the unused arm, or just leave it...that won't hurt anything. It just looks neater to snip it off.
For ailerons and elevator, put the push rod connector in the innermost hole of the servo arm. Here's what you'll start with (bottom), and what you'll end up with (top):

For the rudder, use the longest single arm that comes with the servo because it will give you a little more control throw. Put the push rod connector in the outermost hole of the servo arm. Personally I like to get all the rudder movement I can steal, so you may have to max out your end point controls. As it is this way, you won't be having the rudder hit the elevator halves on full deflection, but you don't need for it to.
Below left, is the arm you will use. Below right is what it will look like when you are done.

Here is the funny part: This is the least amount of mechanical throw you can dial into this plane, but it is absolutely perfect this way. Just make sure your end points are at 100% and you will be golden.
I'm a bit shocked that it turned out this way. I figured it would be a little too much or not quite enough. I tested the plane on high rates, and aside from having to add some up trim to compensate the forward CG, she was set up exactly like I was looking for.
As you can see in the following photos below, hookup to the servos and control surfaces is extremely simple. Not only is this essential to make for an easy build, but complicated things can unravel really fast in the air, and we don't want that. The push rod has a Z bend on the one end that goes into the control horn, and the other end is secured by 3DHS' adjustable push rod connector.
Elevator

Ailerons

Rudder

Radio Programming
Mechanically, that's all there is to it. The rest is radio programming. I like to run 30% exponential on the ailerons and elevator, and a full 75% on the rudder. The reason I like that much on rudder is that you can get huge movement for snaps, spins and such, but the expo keeps the rudder response from being twitchy.
For your low rates, program your radio for what we have listed below. Fly it like that for a few laps and then try the high rate. You can go back later and add to or subtract from the low rate to suit the way you like it and to suit the way you'll be flying it. You can use high rates when you want to fly more aggressively.
These two rates are not that much different because we want you to concentrate on flying instead of flipping switches. If you outgrow these throws and want more, use your end point controls to set it where you like it. If you max those out and still want more, you're getting pretty good, and it is time to put the full tilt extreme set up on the plane with 3DHS' extended control arms.
Sport Set Up High Rates
Ailerons: 11 Degrees 3/4"
Elevator: 15 Degrees 7/8"
Rudder: All you can get
Sport Set Up Low Rates
Ailerons: 9 Degrees 1/2"
Elevator: 10 Degrees 3/4
Rudder: All you can get (or tone it down if you like)
Exponential: 30% on both high and low rates for ailerons and elevator. 75% for rudder on both high and low rates.
For Futaba users who don't want to monkey around with all the measuring, follow the mechanical set up exactly, and use 100% end point and 100% for a high rate. Dial the low rate on elevator and ailerons to 70%, and you will have exactly the plane I have.
Getting The CG Right
For sport you want a little more forward CG. This just makes the plane more stable. Where we would like you to start is 3.25" behind the leading edge of the wing, measured at the root of the wing, where it meets the fuselage
I like to pick mine up with my fingertips, near the wing root, on the back of the leading edge sheeting. That comes out to the same thing as 3.25". This works perfectly, but you can get used to the plane first, and maybe move it around to suit your own flying style later.
Now, remember that this set up is for the new guys and the CG is pretty far forward. You are going to carry some up trim, so I suggest you set the elevator level with the trim centered, and then add in two or three notches of up trim. That could get you real close because that's where mine is.
In the photo below, you can see I outlined the first open bay of the wing. You want to balance the plane on the back of the leading edge sheeting, with your fingertips just inside of the sheeting that runs parallel to the fuselage. I've drawn a red arrow to show you where to put your fingertips.

OK, it's not as scientific as using a micrometer, but it doesn't have to be. You're going to dial it in to where you're happy with it by moving the battery back and forth until the CG is where you want it. This is just a place to start, and you don't have to measure it or anything, or put marks on the bottom of the wing where you can't see them anyway. You just pick it up by the back edge of the sheeting where I showed you. If it balances level or a little nose up or nose down, you're there. That's how I do it and it's really fine there. I like it there, so you may never change it.
Actually, the SHP doesn't much care where you put the CG because it is very, very tolerant if you get it wrong. I've flown SHPs that people had gotten horribly out of whack, and they were still easy to fly. Well, not as easy as when it's right, but be confident if you miss the CG by 1/4" it's not going freak out on you and spin itself into the ground. Now, if you put the battery in the tail, then you're going to have problems.
For sport, and especially the new guys, forward is going to work best for you. Where I've told you to put it is just fine and you don't need to go any further forward. As far as moving the CG back, that will make the plane more agile, but it won't be as stable, forgiving, and it won't track as well. It's still going to be great, but remember this article is aimed at the newer pilots who need the plane to give them as much help as possible.
The Set Up Nail
Finally, nothing is written in stone here. If your tastes and flying style requires more or less throw, or a different CG, feel free to change things around. Our set up is just a baseline starting point that will give you a gentle, easy flying, yet agile sport plane. Also, as you progress with your flying skills, you will know more about what you want from the plane. Don't be afraid to experiment, but make small changes at first. Eventually you'll know how to get the plane exactly the way want it.
However, plenty of guys have used our set up, never changed it and are thrilled with the plane.
You don't have to push yourself unless you really want to, but if you do, you'll end up needing the extreme set up for this plane, and we plan to go into that in a future article.
EQUIPMENT

Extreme Flight Torque 2818 Motor
The original SHP was designed around the Extreme Flight Torque 2818 motor, and it is the perfect power plant for the new SHP too. The firewall is set up with the holes drilled and blind nuts installed so the 2818 bolts straight to the firewall with no modifications at all. While many motors are suitable for the SHP, it's nice to use something that fits perfectly the first time with no tinkering. Tighten four bolts and it's done.

The 2818 motor is just the right amount of power on 3s (3 cell, 11.1 volts) batteries and an APC 13/6.5E prop. Some guys like to run a 14/7E, but in the Florida heat we play it a little safer with the 13/6.5. The 13 gives you a little less amp draw and it is still plenty of power for speed and punch out. Personally I also prefer the 13 because it seems to give a little quicker throttle response whereas the 14 has a very short delay.
So far we haven't found anything that runs as smoothly, reliably and sounds as sweet as a Torque motor. They run so beautifully that I don't want anything else. They are also backed by Extreme Flight, a solid company with a well earned reputation for outstanding customer service.
Airboss 45 ESC
Again, like all our other projects, nothing but the Airboss ESC is good enough. We have tinkered with other units here and there, but nothing gives me as much confidence as knowing I have an Airboss under the cowling. If the ESC dies, it's a good bet the radio is going to go out with it, so I just can't afford to chance anything less than an Airboss.
The Airboss is so trouble free that I generally plug one in and never see it again until I have worn out the airplane. Every so often I will visually check them if I happen to have the cowling off for something else, but there isn't much more to it than that.
Plug it in, forget about it and fly. Why do I need something more complicated than that?
We placed our Airboss 45 outside of the motor box. This keeps all the wires out of the battery compartment and makes changing the battery out much easier. It also puts the ESC right in the middle of the cooling airflow coming inside the left cheek cowling.

One of the Airboss' essential features is that it was developed with a nice, flat, linear throttle curve. In simple terms, when you add a notch of power, you get a notch, add two notches, you get two.....and so on. Some ESCs won't even fire up the motor until you get to 1/3 throttle or so, and that is utterly useless for serious flying. You need an ESC that gives you exactly the power that you demand, when you demand it.
The throttle mapping on the Airboss is superb. Not only that, but it is exactly the same from one Airboss to another. This way I can switch airplanes and not have to relearn the motor's response. When you fly right on the edge, you have to have this kind of progressive and reliable control. I always fly right on that ragged edge, and that's why I fly Airboss and nothing else.
While you won't be flying the SHP on anything but a 3 cell battery, when you're are ready to move on to a more powerful ship, so is the Airboss. Unlike most other ESCs, the Airboss Elite can handle up to five cells without the need for a seperate BEC and all the associated rat's nest of extra wiring. This keeps things extremely simple. Plug it in and it works. If you want to run three cells, four cells or even five cells, just drop them in and change your prop to keep the amp draw below 45, or less if you motor isn't rated that high.
It is also worth noting that the Airboss Elite ESC just works. A nice surprise on the newer Airbosses is that they already have the deans connector soldered on!
Just plug it in and fly it.
On the newer Airboss Elite 45s, no reprogramming necessary because the ESC self-detects how many cells you are running and adjusts the low voltage cutoff (LVC) accordingly. The LVC is a power-down type of cutoff, meaning that when you run your lipos down to their minimum rated voltage, power will drop off enough for you to notice and land. You've still got enough time to set up a landing approach, and you've got enough power too. The thing isn't going to just shut down and wreck your plane, so this is a nice feature.
Most important is to get a power system that runs cool and reliably. The Extreme Flight Torque Motors and Airboss Elite ESCs are recommended for the Extra SHP for precisely those reasons. Check your amp draw, and keep it below 45.......and your Extreme Flight power system should give you outstanding performance and run almost forever.
Batteries
We long ago gave up trying to find a better battery Li Po battery than Thunder Power. They give us lots of gut wrenching power, great longevity, and they are backed by one of the best companies in the industry. Unique to Thunder Power is their half price crash damage replacement policy. It might only be half price, but that's a full half more than any other company will give you.
Battery technology has come a long way in a very short time. It wasn't that long ago that I refused to run 3s (3 cell) batteries because they didn't have enough grunt. With Thunder Power's newer 30C Pro Power series, power output has risen to the point that now it is not only enough power, but it is close to bordering on too much! I have switched over all my 47" planes to 3s Pro Power batteries because they give me exactly the amount of power I am most comfortable with. Too much, as with 4s power (4 cell), is more difficult to control, but 3s used to not be enough. With 3s Pro Power 30C I've got exactly the right balance of power to weight.

You can get Pro Power batteries in up to a 45C discharge rate, but for what we are doing, you simply don't need it. The 30C batteries have been out for a little while now, and they are very well developed, refined, and extremely reliable. Less expensive is also a nice benefit too.
Another plus for the 30C Pro Power packs is the ability to charge them at up to a 5C charge rate. I'm using an older Thunder Power 610 charger, but it will charge up the 2250 Pro power packs at 8 amps (as compared to older batteries of the same capacity charging at 2 amp). This means my charge times have gone from about an hour down to about 18 minutes!
Charging at this rate means that I can put the battery on the charger, get something to drink, socialize with the guys, check the plane over, and by the time I have waited for my turn to fly, the battery is ready to go again! Like this I can get away with taking just a single battery to the field and still fly almost any time and every time I want!
When you add up the power, reliability, Thunder Power's excellent warranty and customer service, along with the need to buy less packs to begin with, I don't really see the need to buy cheapo knock off batteries that don't give me any of those things. You'll spend a little more money on a Thunder Power, but a Cadillac also costs more than a Yugo.
For the SHP, we have always used a 2100-2250 mah capacity battery. This gives us a run time of around 5 to 6 minutes, while still using a relatively light weight pack. These Pro powers are 2250 mah capacity, and while this is about right, I don't like to run my batteries down below their 11.1 rated voltage.
Running a battery low is a good way to damage it, so I like to leave myself a good voltage margin. For this reason we are also trying Thunder Power Pro Power 2700 mah packs. They don't weigh that much more and I figure the extra capacity will come in handy if I fly really hard and use up more current than expected. KE spins, for example, draw about as much current as a dead short, and you can drain a battery really quickly if you do more than a few. While running a Li Po battery low is bad enough, running it really hard at the same time is the best way I know to damage one, so the extra capacity is just a safeguard.
We have flown the SHP with batteries as large as 4000mah and it was still a very nice plane, but nothing like when it is light weight. The heaviest battery that we like to run for sport is 3000 mah. The plane isn't weighed down too much and it's still the most floaty flying sport plane at the field.
We don't have any plans to try other brand batteries, but then again, we don't need to. These Thunder Power 30c Pro Power packs are exactly the right battery for us.
Servos
We've tried all kinds of servos but we keep coming back to Hi tech. For the 47" class planes, the HS65 is king, though I like the metal gear versions. They are stronger for sure, and this comes in handy when you bang the rudder on the ground, or maybe hit the tail on the door loading the plane in the car. I have, in fact, stripped metal gear servos in rudder bangs, but it was only in really hard hits that wrenched the rudder sideways.
We have so little trouble with Hi Tech servos that we've stopped looking around. You spend a few more dollars, but remember that a servo failure can cost you an entire airplane. A little more to get the best and rest easy is cheap insurance.

And this is before Hi Tech's outstanding customer service. I've stripped servos, and I've actually worn a few out from years of hard abuse, but Hi tech always tightens me up. It's a little slow with a week's shipping both ways (Fla to Ca), but it's always worth it. Half the time they just replace the servos with news ones, which is hard to argue with. The ones they fix work like new, so either way they take care of me.
As a die hard Futaba guy of 35 years, I am loathe to change radios, but Hi tech servos and Hi tech service has me giving their new Aurora 9 a hard look. It looks like an awesome setup, and lots of guys are just giddy happy with it. I am probably going to have to try one, simply because they have earned my brand loyalty.

No comments:
Post a Comment